Inventory, Order Entry. Job Costing, POS: How to restrict/limit Unit of Measure dropdown options per Inventory Item on Source Document transaction lines.
Summary
Description
This article explains how to restrict/limit Unit of Measure record options per Inventory Item on Source Document transaction lines.
For example, consider the following scenario:
Your company sells 10 types of cool drinks.
The following UOM records have been created, all linked to the Amount UOM Category:
- Single
- Double
- 6-PACK
- 24-PACK
- 5-PROMO
- 10-PROMO
However, specific Inventory Items can only be sold with specific UOM record types.
For example:
Item Sprite XR, Sprite XT, and Sprite XZ can only be sold using the Single, 6-PACK, or 12-PACK UOM types.
Item Cranberry Fizz can only be sold using the Single, 12-PACK, or 10-PROMO UOM types.
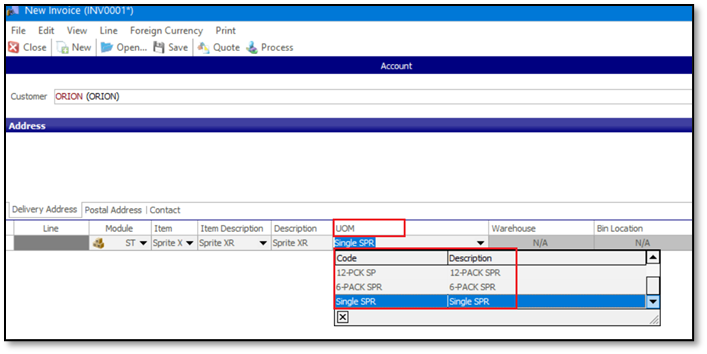
When capturing a Sales Invoice, for example, item Sprite XR, you will notice that all UOM types are available.
This makes it difficult/inefficient to select the specific UOM option for the transaction line, especially if there are numerous UOM options.
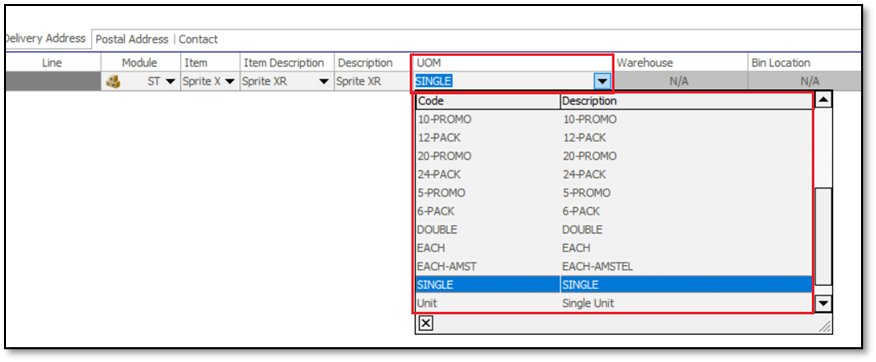
Therefore, let’s show you how to restrict the available UOM options per Inventory Item on the Invoice or Goods Received Voucher (and other source document) transaction lines.
Resolution
Apply the following steps to achieve the above outcome:
Phase 1: Preparation of Inventory Items
It is not possible to change the Stocking Unit of Inventory Items if any transactions have been processed on them.
Therefore, for these items, do the following:
1. Process an Inventory Journal to set their quantities to zero in all warehouses, BIN locations, etc.
2. Go to Inventory | Rename Item Code. This is required if you need to re-use the same original Item Codes.
3. Rename the relevant Inventory Items. For instance, Item Code AAA becomes ZZZ-AAA-DO NOT USE.
Phase 2: Setting up Unit Of Measures per Item
1. Go to Inventory | Maintenance | Unit of Measure Categories.
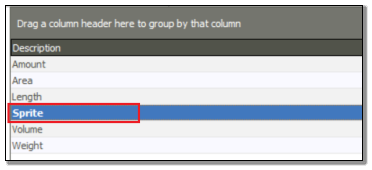
2. Create new Category records as per your required UOM requirements. For instance, you may have a range of Inventory Items that will be using the same range of UOM options for purchasing or selling transactions.
3. In this scenario, we’ll create a new UOM Category called Sprite.
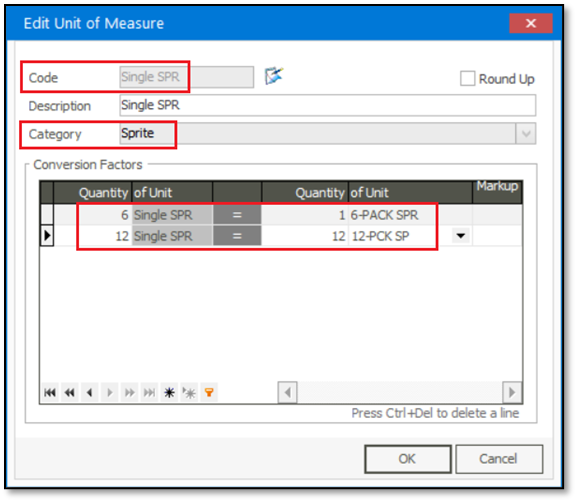
4. Go to Inventory | Maintenance | Unit Of Measure and create the specific range of UOM records as linked to the Sprite UOM Category.
5. Go to inventory | Maintenance | Inventory items and create the inventory items with the correct UOM values.
Use the original item codes, e.g., AAA when creating the new inventory item records (if you need to re-use the original item codes).
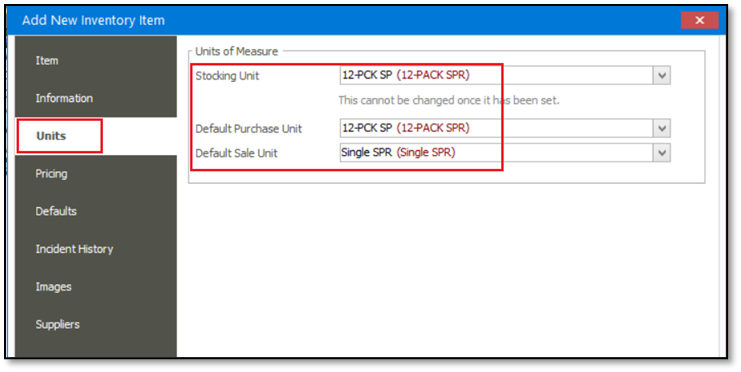
6. Perform an inventory Count, or capture and process an inventory journal to update the quantities for the newly created inventory items.
7. When you now purchase or sell the item, the UOM dropdown is limited to only the relevant UOM option.
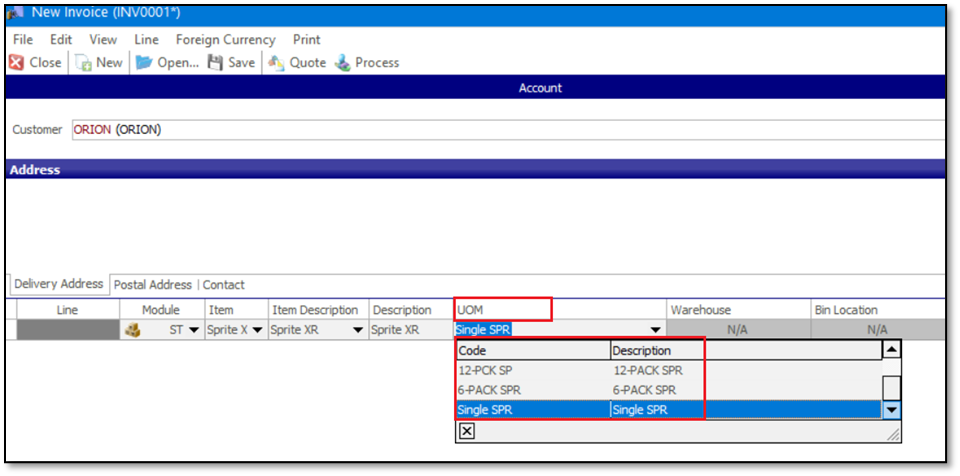
8. Finally, also notice the following:
This refers to the UOM category linked to the specific UOM record selected on the stocking unit of the inventory item maintenance screen.
This value determines which UOM records are available above for selection.
In this case, the stocking unit is 12-PCK SP, as linked to the Sprite UOM category.
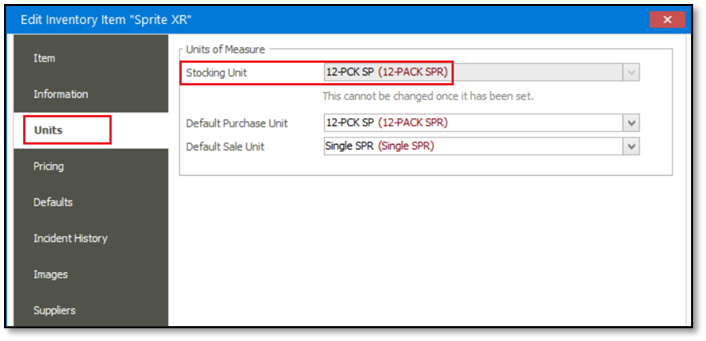
Therefore, only UOM types linked to the Sprite UOM category are available for selection on the Sales and Supplier Invoice (and other source documents) transaction lines.
